 Chelsea FaithNovember 14, 2023
Finding the right email in Gmail sometimes feels like a treasure hunt. The endless scrolling, the search bar struggles – it can be too much work.
In this guide, we’ll show you how to sort Gmail by sender. We'll walk you through simple steps, from basic sorting tricks to more advanced tools. Plus, we'll introduce you to Tatem, a super handy email platform designed for speed and your personal touch. Let’s dive in.
Note: Take better control of your inbox with Tatem's smart assistant. Create organized split inboxes, use AI writing tools, and sort emails quickly. Sign up today to take control of your email inbox!
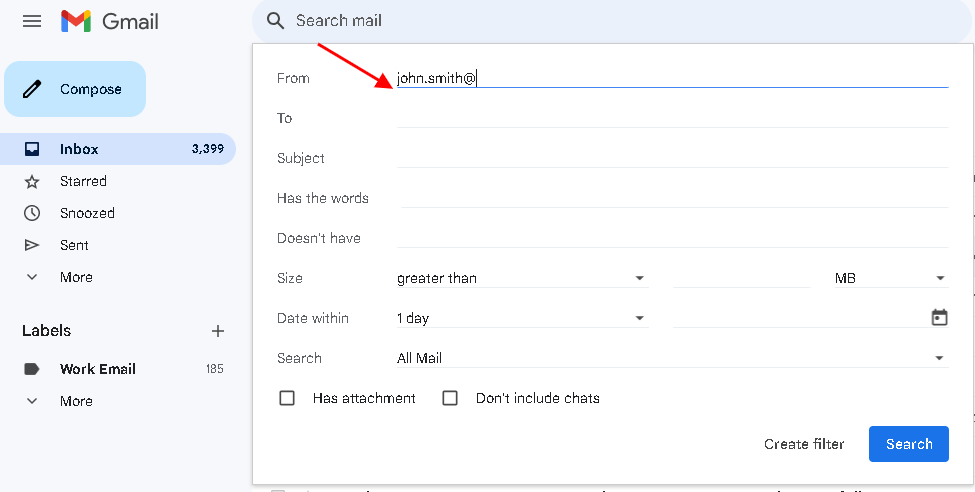
If you frequently receive emails from specific senders, such as colleagues, clients, or family members, this feature streamlines the process of accessing your messages without the need for extensive scrolling.
To access this feature, follow these steps:

Sorting emails by sender is not confined to desktops; you can do it on the go with the Gmail app. Here's a quick guide:
You're in charge of different projects or events, and you want to put together all the related emails so you can find them easily.
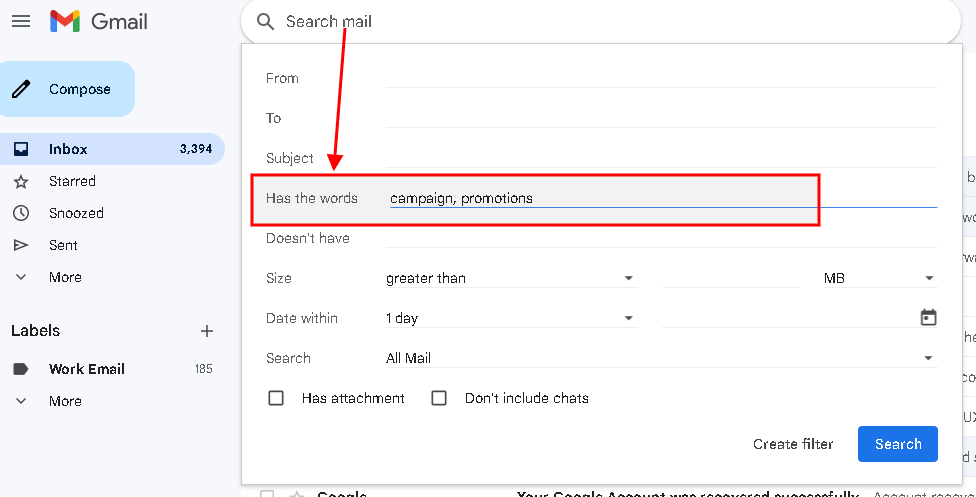
Sorting your Gmail inbox is easier with this function. Organizing by subject lets you group and organize emails based on specific topics, making it easier for you to handle and quickly find the information you need.
Here’s how you can do that:
Enter relevant keywords associated with your desired subject in the "Includes the words" box. For example, if you're organizing a marketing campaign, you might enter keywords like "campaign," "promotion," or "marketing."
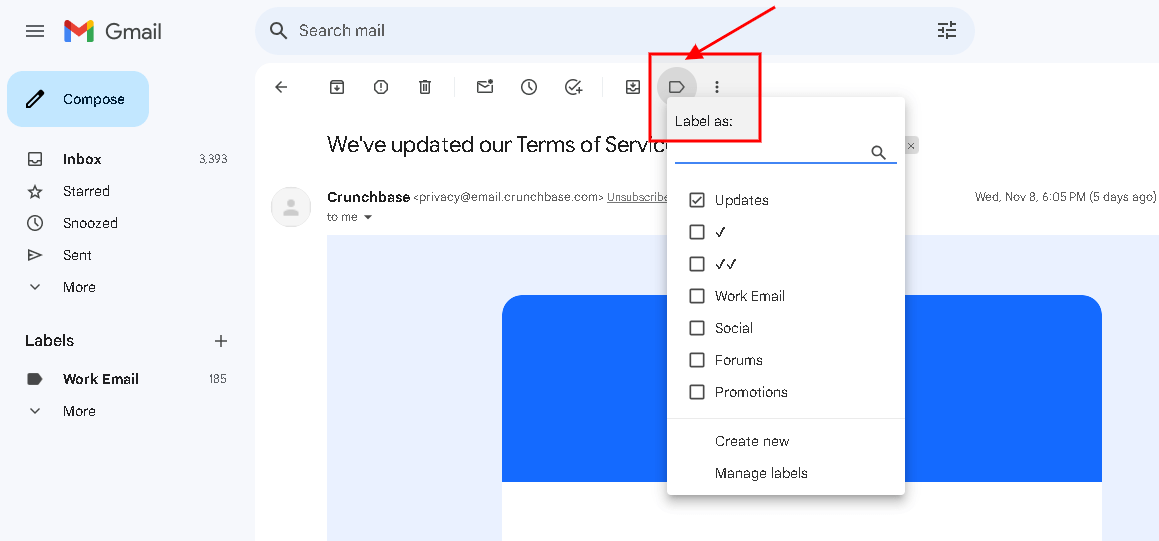
Labels, in essence, are digital markers that you can assign to your emails based on specific criteria. They act as identifiers, allowing you to create a nuanced organizational system tailored to your unique needs.
With labels, you're not bound by a rigid folder structure—each email can wear multiple labels, making them easily retrievable under various contexts.
And unlike folders, which typically house emails exclusively, labels provide a more dynamic approach. For example:
Here's a guide to using labels effectively:
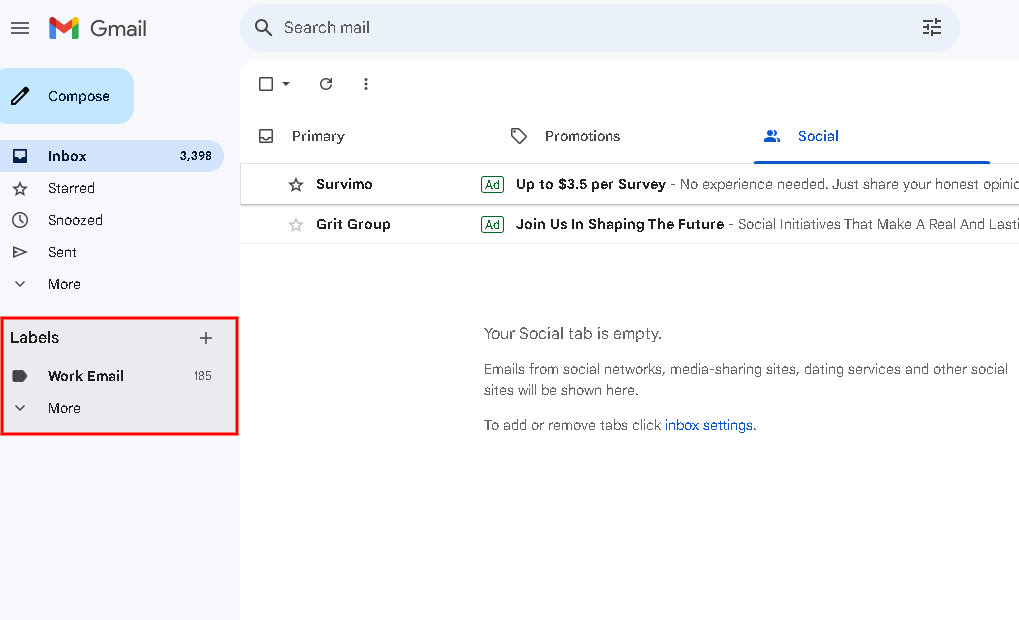
Once you've applied labels to your emails, sorting becomes a breeze:
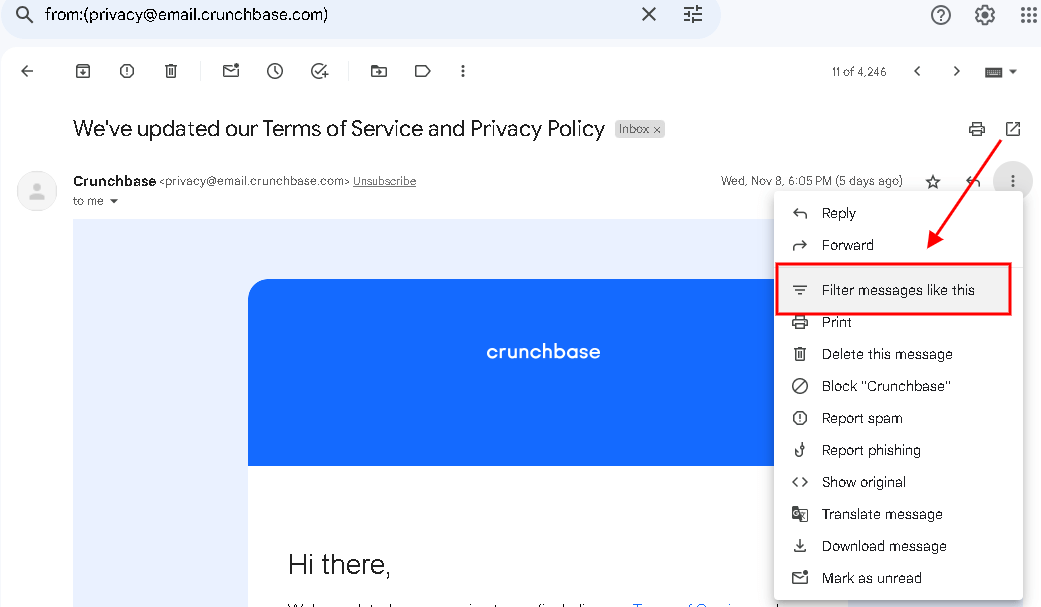
With filters, you can automate actions like labeling, archiving, or forwarding unread messages based on specific criteria. You don't have to sort your Gmail inbox by sender manually.
Let's set up your personalized filters in a few simple steps.
Before diving into filters, identify the criteria that will trigger the filter. This could be a specific sender, subject, or a combination of factors.
Let's say you want to label all emails from your project manager, Sarah. Here's how:
In the pop-up window, Gmail will automatically fill in the sender's email address. You can add more criteria like subject or keywords. Click "Create filter."
Now, decide what you want Gmail to do with these emails. Check the options like "Apply the label" and choose or create a label like "Project Management."
Filters can be as flexible as your needs. For instance, filter emails with attachments or those marked as important. Click "Create filter," and you’re done
Already have filters in place? Manage them by going to Settings > See all settings > Filters and Blocked Addresses. Here, you can edit, delete, or create new filters.
Create a symphony of filters by combining multiple criteria. For example, filter emails from a specific sender with a certain subject. Gmail will seamlessly execute these filters in harmony.
While mastering advanced search techniques and implementing filters in Gmail significantly enhances your email organization, there's a better way to navigate the email chaos effortlessly. Introducing Tatem, a productivity email client designed for speed, convenience, and a seamless inbox experience.
Tatem not only simplifies email organization but also introduces advanced features that go beyond traditional sorting methods.
Sign up today for a seamless inbox experience.